As an Amazon Associate, I earn from qualifying purchases.
Sweaters are the cozy cornerstones of our wardrobes, providing comfort and warmth in chilly seasons. But what happens when your favorite sweater, one laden with memories and well-loved textures, meets its match in the form of a large, daunting hole? Fear not, intrepid knitters and up-cyclers! This detailed guide will demystify the process of mending a substantial breach in your cherished pullovers, ensuring they’re back in action and extending their life on your hangers.
Assessing the Damage: A Hole Lot to Consider
Identifying the degree of damage is the first step in restoring any damaged clothing. When it comes to a gaping hole in a sweater, its size and location are critical factors in choosing the right mending technique. Furthermore, understanding the yarn and knitting pattern will help you form an appropriate strategy for a seamless repair.
Size Does Matter
Holes in a sweater come in various sizes, and the technique you use will largely depend on how big the gap is. For small holes, simple darning might suffice. Medium-sized holes may benefit from a combination of darning and patching. Large holes, on the other hand, will most likely require a sturdy patch to maintain the strength and integrity of the fabric.
Location
The position of the hole can also influence the repair method. Is it situated on a relatively flat surface or does it interrupt the rhythm of a cable or lace pattern? The latter will demand extra care and possibly a more intricate approach to maintain the design’s aesthetic.
Know Thy Yarn and Knit Style
Different fibers and yarn textures may require different handling. While wool is stretchy and forgiving, silk and cotton can be less so. Similarly, the tension of the knit—whether it’s tight or loose—will alter how you approach the mending process.
Tools and Materials: Gathering Your Repair Arsenal
Before setting out on your mending journey, it’s essential to have the right tools at your disposal. To make sure you’re ready for any holey encounter, here’s a list of necessities.
Embroidering Needles
These needles are larger and sturdier than the typical sewing needle, perfect for weaving through the yarn of your sweater.
Matching Yarn or Fabric
For patching, you’ll need a material that matches the color, weight, and texture of your sweater yarn. This can be yarn from the original skein or a piece of the same fabric.
Scissors
Sharp scissors will help in trimming frayed edges and cutting materials for your patch.
Stitch Markers and Pins
These will help keep everything in place as you work, especially for more complex repairs.
Stabilizing Fabric
When trying to mend a hole, you might need some interfacing or another fabric to stabilize the area, particularly if the damage has stretched the sweater out of shape.
Preparation is Key: Ready, Set, Mend!
Preparing your sweater for repair is crucial in making sure the mending process is smooth and effective. This step minimizes further unraveling and ensures that the area to be mended is secure and ready for restoration.
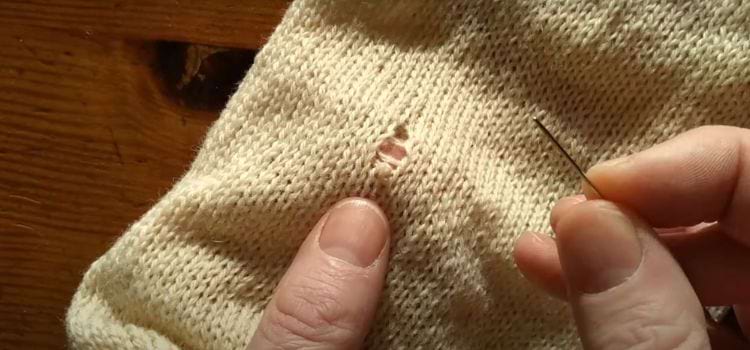
Get the Surface Ready
Smooth out your sweater by laying it down on a level surface. This step is particularly important if your sweater has been sitting in a heap, as it will help you identify loose stitches and prepare them for the needle.
Secure Loose Threads
With your sewing or darning needle, carefully weave in any errant strands on the edges of the hole. If the hole is large, these threads can be used to your advantage in the darning process.
Stabilize the Hole
If the hole is significant or at risk of further stretching, using a stabilizing fabric on the inside of the sweater can make the repair more durable. Cut a piece slightly larger than the hole and pin it in place.
Mending Techniques: A Stitch in Time for Your Sweater
Once your sweater is prepped and you’re armed with your tools, it’s time to mend. Here are two fundamental techniques to restore integrity to your garments: darning and patching.
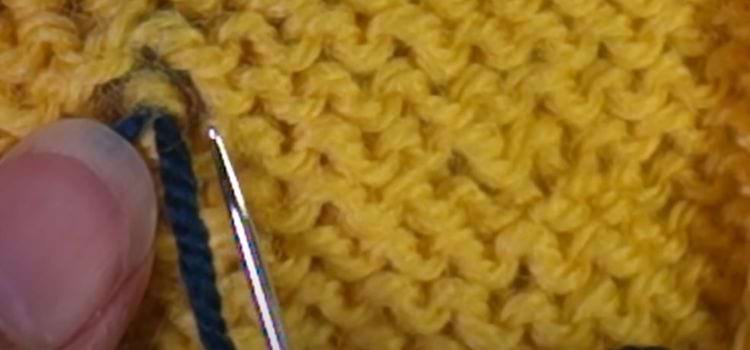
The Art of Darning
Darning is the act of reconstructing a fabric by imitating the weave and texture of the surrounding area. For a large hole, you’ll first span the gap with the yarn, securing it along the edges to build up the fabric. Then, you’ll weave the yarn in a back-and-forth motion, mimicking the original stitches. This technique works well for holes where the fabric can still support itself structurally, but is weakened and in danger of unraveling.
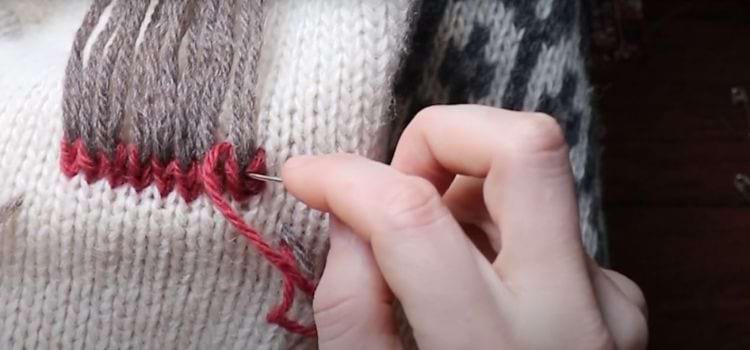
Patching Up
If your sweater has suffered a significant breach, patching might be the most efficient way to restore it. You’ll begin by cutting a patch from your matching yarn or another piece of compatible fabric. Pin it securely over the hole, placing the pins outside the area you’ll be stitching. Using a whipstitch, attach the patch to the sweater by sewing along the edge of the hole. Remember that the goal here is to blend the patch seamlessly into the rest of the garment, both structurally and stylistically.
Finishing Touches: Blending and Beautifying
With the hole now mended, there are a few final steps to ensure your sweater looks as good as new. The finishing touches will blend the repaired area with the rest of the garment and maintain its overall form.
Blending the Mend
To make the area you’ve worked on less noticeable, take a second look at the surrounding fabric. Can you tweak a few stitches or add an additional row to balance the texture? Sometimes, a little extra effort in spreading the repair subtly across the fabric can make a big difference in the finished look.
Block and Reshape
Depending on the type of yarn and the repair method used, your sweater may benefit from blocking. Wetting the sweater, giving it a new shape, and letting it dry in that shape are the steps in this method. Blocking can help smooth out unevenness and any slight puckering around the mended area, giving your sweater its natural drape back.
Tips and Tricks: For a Hole-Free Future
Like any skill, there are always tricks of the trade and quick cuts that may speed up the process and yield more satisfying results. Here are some more pointers for your next repair projects.
Save Scraps
If you’re regularly knitting or sewing, keep a stash of fabric and yarn scraps that match your frequently worn items. When the time comes to mend, you’ll have immediate access to materials that already blend in.
Embrace Imperfections
Not every mend will be invisible, and that’s okay. Each repair tells a story of the garment’s life and your commitment to its longevity. Sometimes, a well-loved, visibly mended item is even more endearing than a pristine one.
Reinforce the Weak Spots
After mending, particularly if you’ve patched a hole, consider reinforcing the area with an understitch. This extra line of sewing close to the edges of the patch on the inside of the sweater can add an additional layer of strength to the repair.
Practice Preventive Maintenance
Learn the circumstances that led to your sweater’s untimely tear. Were you wearing it in a high-friction setting, or did a piece of jewelry catch a thread? Being aware of the sweater’s weak points can help you avoid future mishaps.
Conclusion
Sweater mending is a valuable skill, bridging the gap between sustainability and personal style. By taking the time to mend, we extend the life of our garments, reduce waste, and reaffirm the spirit of craftsmanship and care. As you resurrect your beloved sweaters from the brink of disposal, take pride in the art and practicality of mending. Your wardrobe—and the planet—will thank you.
As an Amazon Associate, I earn from qualifying purchases.
Leave a Reply